The sun is back and the kids are finally getting their dose of Vitamin D ... under the sun and loving it!
What better way to celebrate the sun coming back than to spend some quality time in the garden - digging, picking fruit off the trees and enjoying each other's company. So it was off to E and N's great-grandparent's house for some lunch and gardening... And the beginning of our very own worm farm!
All you need to make a worm farm is:
A clear bottle or container
Some hay, leaves, or mulch
Soil
Worms
Fruit/vegetable scraps
Black paper
First, the kids began digging the soil. The kids always enjoy doing this and can keep them entertained for ages - they even have a special spot in the garden where they can dig so that they don't dig up any new seeds or destroy any of the growing crop already in the garden.
While they were doing that I cut the top off our bottle so that we could easily put in all the things we needed to make the worm farm.
Pretty soon the kids got to some moist soil and this is where the fun started... Worms galore!
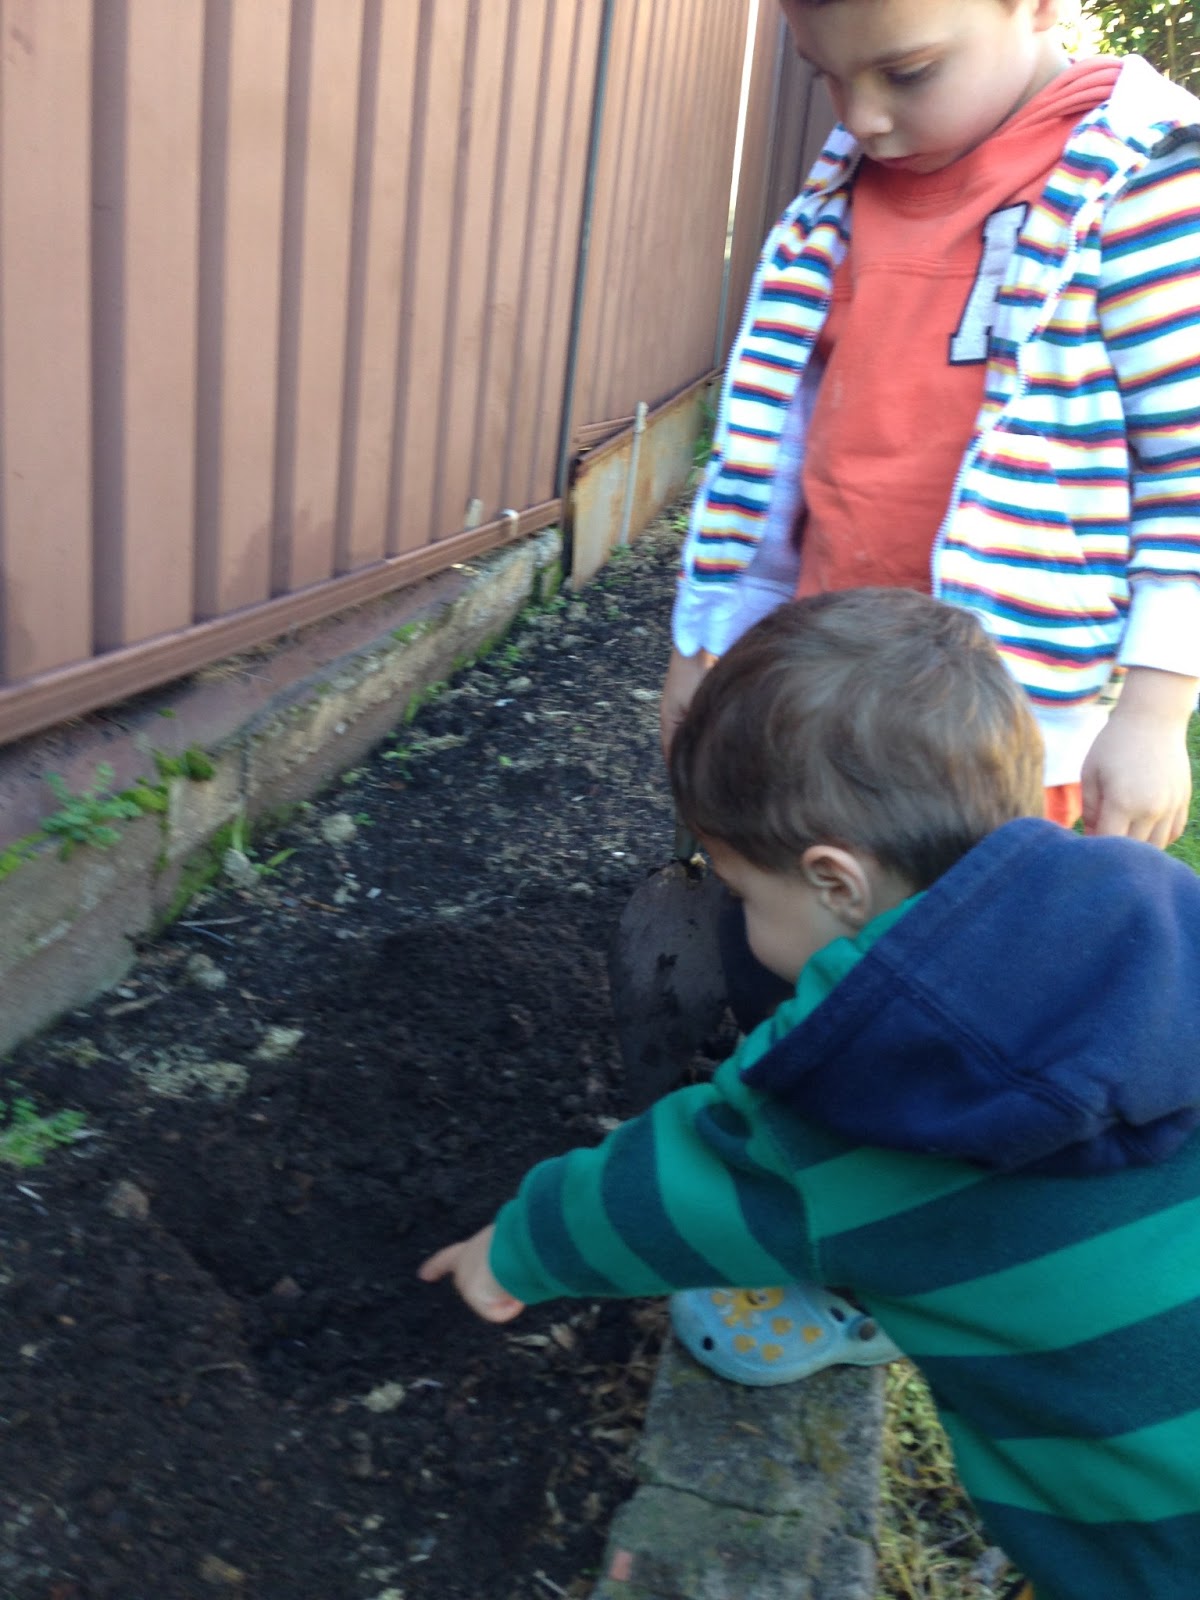
We found lots of worms - the kids were really excited and were describing them
"Look mummy! That worm is so small, it's so cute!" (Never thought I'd hear that! Haha)
"That worm is dancing!"
"This worm is so fat!"
"Yuuuck!"
"That worm is digging back down in the dirt. Come back, worm!!"
We put some soil into the bottle and added a couple of worms.
Then a layer of hay that mum had in her garden.
Then continued that pattern until we reached about 3/4 of the way up the bottle. The soil was really moist because of all the rain we have had, but if yours is dry you may want to use a spray bottle to wet the soil.
We taped the top of the bottle back on and the kids put their fruit scraps in as compost.
Worms are nocturnal, so it's really important to keep their environment dark, otherwise this observation wont work well. We taped black paper around the bottle and kept the black paper on for 2 days.
When we took off the black paper and saw what the worms had created...
It was a little hard to point out initially, but finally the kids saw and understood the little tunnels the worms made.
It's a little hard to see in this picture, but you can see a worm made tunnel just under the first groove in the bottle, slanting from the left to the right. There were lots of other tunnels just like this one around the bottle.
Once I pointed it out to them the kids turned the bottle around over and over again, pointing out all of the worm tunnels. They even noticed that the pear scraps that they had put in had turned brown.
We kept the worms for a couple of days and then released them back into the garden - bye bye worms!
The best part about this experiment?
We had just made the worm farm and what did the boys do? Straight to the cumquat tree, picking fruit off the tree and eating them fresh off the tree with their great - grandfather. Love! :) ...
E is a thinker. He asks lots of questions and won’t stop until he gets the answers. He will happily make (and take apart) things around the house, loves cooking and seeing/doing anything different. N is a do-er. He prefers to DO than to think about why. Our days were filled with sports and play dates – “do-ing” activities. I realized one day that I needed to nurture E's love of questions and thinking, of reasoning and proving, and N’s need to “do”. ...And so Science Monday was born...!
Monday, 8 July 2013
Sunday, 30 June 2013
Gooey Goop!
Ever heard of "messy play" and avoided it? Seems like too much trouble? This is the sort of activity that you (and the kids) will love - it's messy but so easy to clean up! Easier than cleaning up dinner, I promise!! :)
I've wanted to do this for a while but have avoided it. So glad we did it though - the kids were so entertained, they played with it for at least 45 minutes - then one thing turned into another and like the other experiments we have done it changed into something completely different!
All you need is:
2 cups of cornflour
1 cup of water
Food colouring
That's it! It's so easy to make - and safe for little fingers (especially if some mixture "accidentally" landed in their mouths haha).
I asked the kids to pour in the cornflour into a bowl. If you do this at home, encourage the kids to run their fingers through the cornflour before you add the water - this is where the sensory learning starts.
Then slowly add the water and ask the kids to quickly mix together the ingredients. While they are mixing, add the food colouring.
It's surprising because it's actually a little hard to mix. I had to get my hands dirty too, to help them along!
After a couple of minutes E became a little bit uneasy, and asked to wash his hands - he didn't like the feel and texture of the mixture. He has always been like this - every time I do an activity where he has to get his hands dirty he avoids it (an example would be when I made jelly but hid some shaped buttons in the jelly for the kids to find - E was the only one who didn't use his hands and asked for a spoon. I did the activity again a few weeks later and he actually quite enjoyed using his hands this time around!).
N kept mixing and lifting the mixture. He thought it was so cool how when he lifted it, the mixture was all stringy. It stuck to his hands and made what looked like a web - he was so excited when he told me about it... "Look mummy! A spider web!! Mummy look!" He was so excited.
Then you open your fingers and it pretty quickly changes back into a liquid
Why?
"Solid or Liquid: Cornflour is made of lots of long, stringy particles. When water is added they do not dissolve in water, but they do spread themselves out. This allows the gloop to act both like a solid and a liquid. When you roll the mixture in your hands or apply pressure to it, the particles join together and the mixture feels solid. But if it is left to rest or is held up and allowed to dribble, the particles slide over each other and it feels like a liquid." (learning4kids.net)
Where did the experiment take us?
You wouldn't believe it if I told you....
Remember how E didn't like the texture at the beginning? After a while he added more water to the mixture... probably about 4 or 5 cups...
Why did he do this?
"Now we can wash our hands, mummy!" He was just so proud of himself! I love how kids minds work :)
It was easy to fix that after they had finished playing - the cornflour sank to the bottom and I was able to pour the excess water out of the container and save the rest by putting it in a snap lock bag.
Believe me when I say it's easier than cleaning up dinner mess!! All you need is a wipe (or 2) and wipe it off... Too easy!
I've wanted to do this for a while but have avoided it. So glad we did it though - the kids were so entertained, they played with it for at least 45 minutes - then one thing turned into another and like the other experiments we have done it changed into something completely different!
All you need is:
2 cups of cornflour
1 cup of water
Food colouring
That's it! It's so easy to make - and safe for little fingers (especially if some mixture "accidentally" landed in their mouths haha).
I asked the kids to pour in the cornflour into a bowl. If you do this at home, encourage the kids to run their fingers through the cornflour before you add the water - this is where the sensory learning starts.
Then slowly add the water and ask the kids to quickly mix together the ingredients. While they are mixing, add the food colouring.
It's surprising because it's actually a little hard to mix. I had to get my hands dirty too, to help them along!
After a couple of minutes E became a little bit uneasy, and asked to wash his hands - he didn't like the feel and texture of the mixture. He has always been like this - every time I do an activity where he has to get his hands dirty he avoids it (an example would be when I made jelly but hid some shaped buttons in the jelly for the kids to find - E was the only one who didn't use his hands and asked for a spoon. I did the activity again a few weeks later and he actually quite enjoyed using his hands this time around!).
N kept mixing and lifting the mixture. He thought it was so cool how when he lifted it, the mixture was all stringy. It stuck to his hands and made what looked like a web - he was so excited when he told me about it... "Look mummy! A spider web!! Mummy look!" He was so excited.
E came back from washing his hands and saw the progress N had made with the mixture. He heard him talking about the spider web and immediately became interested again. I guess this is an example of peer tutoring - something I have always been a fan of and think it works really well. A child can learn so much from the actions and reactions of their peers. To my delight it worked a treat! E wanted to make a spider web too, so in went his hands again! Yay!
For added fun I put in some shaped buttons and some cotton reels into the mixture. Pretty soon the kids were stamping the cotton reels into the gloop and making quick prints. They were hiding the shapes in the gloop and started playing "see who can find the most shapes!" I love when kids direct their own learning.
One of the most amazing parts of this mixture is that the gloop is both a solid and a liquid. When you pick it up and squeeze it into a ball, it becomes hard and turns into a solid...
Then you open your fingers and it pretty quickly changes back into a liquid
"Solid or Liquid: Cornflour is made of lots of long, stringy particles. When water is added they do not dissolve in water, but they do spread themselves out. This allows the gloop to act both like a solid and a liquid. When you roll the mixture in your hands or apply pressure to it, the particles join together and the mixture feels solid. But if it is left to rest or is held up and allowed to dribble, the particles slide over each other and it feels like a liquid." (learning4kids.net)
Where did the experiment take us?
You wouldn't believe it if I told you....
Remember how E didn't like the texture at the beginning? After a while he added more water to the mixture... probably about 4 or 5 cups...
Why did he do this?
"Now we can wash our hands, mummy!" He was just so proud of himself! I love how kids minds work :)
It was easy to fix that after they had finished playing - the cornflour sank to the bottom and I was able to pour the excess water out of the container and save the rest by putting it in a snap lock bag.
Believe me when I say it's easier than cleaning up dinner mess!! All you need is a wipe (or 2) and wipe it off... Too easy!
Tuesday, 25 June 2013
Explaining Rain!
Yesterday, my eldest asked me if the rain was going to flood the whole world... For those of you who live in Sydney, you would know that there's been nothing but rain for a few days now... If you are anything like me, you too are getting cabin fever and need quick and easy ideas to pass the time while the kids are stuck indoors!
So what better way to beat the rain by explaining how the rain comes!
All you need is a glass jar or a glass, some boiling water, a plate and some ice.
Before I poured the boiling water in the glass, I asked the kids to sit on their hands. This was a bit of a novelty for them but lasted all of a few seconds before they wanted to feel the steam rising from the cup. This is the part of the experiment where you need to hover and make sure the kids aren't going to touch the glass, the water, or the steam for too long. Be so careful!!
After a few minutes, put some ice on top of the plate. Keep watching closely because the droplets of water turn into bigger drops, and it looks like it's raining on the side of the glass. Very cool but so hard to take a picture of... promise it looks better than it looks in this picture!!
I was so excited about seeing the "rain" that I didn't notice much else that was happening. E made the observation that the ice was melting on top of the plate too and it looked like the rain on the ground. "We need a drain for this rain or it's going to flood" he said... Oh my goodness, I love their thinking minds!
Pretty soon part of the fun was touching the melting ice. "It's so cold mummy!" N excitedly notices.
Do you want some other 5 minute experiments to get you through these rainy days?
Try these:
Moving Milk Rainbow
Dancing Sultanas
So what better way to beat the rain by explaining how the rain comes!
All you need is a glass jar or a glass, some boiling water, a plate and some ice.
Before I poured the boiling water in the glass, I asked the kids to sit on their hands. This was a bit of a novelty for them but lasted all of a few seconds before they wanted to feel the steam rising from the cup. This is the part of the experiment where you need to hover and make sure the kids aren't going to touch the glass, the water, or the steam for too long. Be so careful!!
Once you have poured the boiling water into the cup, put a plate on top of the glass. Leave the plate here for a couple of minutes before you do the next step. Your kids will love just looking at the droplets of water that form on the side of the cup.
After a few minutes, put some ice on top of the plate. Keep watching closely because the droplets of water turn into bigger drops, and it looks like it's raining on the side of the glass. Very cool but so hard to take a picture of... promise it looks better than it looks in this picture!!
I was so excited about seeing the "rain" that I didn't notice much else that was happening. E made the observation that the ice was melting on top of the plate too and it looked like the rain on the ground. "We need a drain for this rain or it's going to flood" he said... Oh my goodness, I love their thinking minds!
Pretty soon part of the fun was touching the melting ice. "It's so cold mummy!" N excitedly notices.
Do you want some other 5 minute experiments to get you through these rainy days?
Try these:
Moving Milk Rainbow
Dancing Sultanas
Moving Milk Rainbow!
This one is an awesome experiment if you have 5 minutes to spare... I did it while my kids were driving me crazy - I needed them to sit and amuse themselves (and not annoy each other!) while I quickly finished off dinner.
Also a good idea if your little one asks you if it is "Science 'Expeniment' Monday" (no that wasn't a typo) on a Friday - quick and easy and all the things you need for it should be right there in your kitchen, ready to satisfy a curious mind (or 2!).
All you need is a plate, some milk, food colouring and a drop of dishwashing detergent.
First, you pour the milk into the plate.
Then ask your little ones to put a few drops of food colouring into the milk (I just learned that if food colouring gets on their fingers try to wash it off with toothpaste or lemon - it works a treat!)
Then all you need to do is drop in 1 drop of dish washing detergent into the milk - and watch the results. It is actually quite amazing how the milk reacts to the dishwashing detergent. My kids loved watching the swirls and patterns that it made.
When the milk mixture stopped moving, E added another drop of detergent - and the movement started all over again! They dropped in about 2 more drops of detergent until all the colours had mixed together - N even noticed we had (coincidentally) made the same colour as the detergent!
Then of course the experiment took another unexpected turn - the kids started blowing on the milk and detergent mixture to see what happened - it made the swirls faster and made the kids giggle - priceless!
What a great way to discuss mixing colours (no paints needed for this one!!).
Very, very cool!
Looking for other 5 minute science experiments to pass the time?
Try:
Dancing Sultanas
Explaining Rain
Also a good idea if your little one asks you if it is "Science 'Expeniment' Monday" (no that wasn't a typo) on a Friday - quick and easy and all the things you need for it should be right there in your kitchen, ready to satisfy a curious mind (or 2!).
All you need is a plate, some milk, food colouring and a drop of dishwashing detergent.
First, you pour the milk into the plate.
Then ask your little ones to put a few drops of food colouring into the milk (I just learned that if food colouring gets on their fingers try to wash it off with toothpaste or lemon - it works a treat!)
Then all you need to do is drop in 1 drop of dish washing detergent into the milk - and watch the results. It is actually quite amazing how the milk reacts to the dishwashing detergent. My kids loved watching the swirls and patterns that it made.
When the milk mixture stopped moving, E added another drop of detergent - and the movement started all over again! They dropped in about 2 more drops of detergent until all the colours had mixed together - N even noticed we had (coincidentally) made the same colour as the detergent!
Then of course the experiment took another unexpected turn - the kids started blowing on the milk and detergent mixture to see what happened - it made the swirls faster and made the kids giggle - priceless!
Very, very cool!
Looking for other 5 minute science experiments to pass the time?
Try:
Dancing Sultanas
Explaining Rain
Tuesday, 18 June 2013
Electricity through a Potato!
This week I decided to be a little bit different.
E is a big fan of electricity - he loves cords, wonders how things work and tells us to go to the electricity box outside when the electricity in the house cuts out. The reason why he is so fascinated with it is because he knows that he is not allowed to go any where near powerpoints... He follows this rule, but it doesn't stop him pretending to be an electrician or telling us when things need charging.
Because of this, I wanted to provide him with a safe way to explore electricity... I googled it and stumbled on a kit on ebay called "Potato Clock Novel Green Science Project Experiment Kit" (only $3.25, no extra for postage - bargain!)
The kit came with 2 types of metal - copper and zinc - wires, a small digital clock and some plastic cups.

(E showing off one of the computer cords and the wires for the experiment)
I initially set up the wiring for them - this was a little fiddly for small fingers - but as I was doing it I read out the instructions while they handed me the next piece of equipment.
We used two potatoes and put in a copper rod and a zinc rod in each potato - within seconds the small clock turned on - the kids were so confused and were asking so many questions about how it was working. They took out all of the metal pieces and did the experiment over and over - sometimes it didn't work because they put two of the same type of metal on one potato - so they had to use their problem solving skills to work out how to fix it. It took a while but they got there!
E asked about the cups - what were the plastic cups for? To be honest I had totally forgotten about them...We soon worked out that they were there to try experiment with different liquids - so we tried filling them with water, or salt or anything else that we could get our hands on, placed the metals in the cups and waited for the clock to turn on... Some of the time it worked and sometimes it didn't - it all depended on what was in there! The kids also noticed that when the metals were touching the clock turned off so they started doing this on purpose and had a giggle every time it happened!
It happened to be a public holiday the day we did this experiment, so husband J was around to see it too! He quickly got excited and tried to show us some experiments of his own.
First, J asked for a "canister" (after a few minutes we worked out what he was actually asking for was a sifter!! haha) ... Then he tried to show us how water doesn't go through the holes if you tip the bottle/ cup a certain way... umm.. It didn't actually work (even though he tried a couple of times), but we sure had a big laugh in the process... I'm still laughing!!! :)
That experiment was abandoned and he started on another -
All he needed was a plastic bottle and a tissue. He put the tissue at the top of the bottle and asked the kids what would happen to the tissue if he blew on it. E thought it would go inside the bottle and N didn't really know what to say!
J blew on the tissue and it shot right back out at him... the kids thought this was hilarious so we all had a go...
Such an easy experiment to do with the kids!
Then of course, kids being kids, they turned back to the potatoes, poured the salt all over them and started making "baked potatoes" for the oven! Yum, yum *cough*
I love how engaged they were in these experiments!
I would love to hear how your little ones go with these experiments :)
How much/ little do you explain the science behind the experiment?
E is a big fan of electricity - he loves cords, wonders how things work and tells us to go to the electricity box outside when the electricity in the house cuts out. The reason why he is so fascinated with it is because he knows that he is not allowed to go any where near powerpoints... He follows this rule, but it doesn't stop him pretending to be an electrician or telling us when things need charging.
Because of this, I wanted to provide him with a safe way to explore electricity... I googled it and stumbled on a kit on ebay called "Potato Clock Novel Green Science Project Experiment Kit" (only $3.25, no extra for postage - bargain!)
The kit came with 2 types of metal - copper and zinc - wires, a small digital clock and some plastic cups.
(E showing off one of the computer cords and the wires for the experiment)
We used two potatoes and put in a copper rod and a zinc rod in each potato - within seconds the small clock turned on - the kids were so confused and were asking so many questions about how it was working. They took out all of the metal pieces and did the experiment over and over - sometimes it didn't work because they put two of the same type of metal on one potato - so they had to use their problem solving skills to work out how to fix it. It took a while but they got there!
Setting up...
Look at the concentration on their faces... priceless
And the excitement when the clock started working!
The teamwork...
E asked about the cups - what were the plastic cups for? To be honest I had totally forgotten about them...We soon worked out that they were there to try experiment with different liquids - so we tried filling them with water, or salt or anything else that we could get our hands on, placed the metals in the cups and waited for the clock to turn on... Some of the time it worked and sometimes it didn't - it all depended on what was in there! The kids also noticed that when the metals were touching the clock turned off so they started doing this on purpose and had a giggle every time it happened!
I didn't really go into detail about how the electricity passed through the potatoes/water etc. - my kids are only 2.5 and 3.5 years - but I did explain it in really simple terms. I showed them that when all of the parts were together the electricity moved through each of the parts and that made the clock work. If we didn't wire it up properly it wouldn't work. E was happy with this explanation, so I didn't elaborate. If he asked more questions I would have explained it more thoroughly (the instructions explain the science of it so I would have used that).
It happened to be a public holiday the day we did this experiment, so husband J was around to see it too! He quickly got excited and tried to show us some experiments of his own.
First, J asked for a "canister" (after a few minutes we worked out what he was actually asking for was a sifter!! haha) ... Then he tried to show us how water doesn't go through the holes if you tip the bottle/ cup a certain way... umm.. It didn't actually work (even though he tried a couple of times), but we sure had a big laugh in the process... I'm still laughing!!! :)
That experiment was abandoned and he started on another -
All he needed was a plastic bottle and a tissue. He put the tissue at the top of the bottle and asked the kids what would happen to the tissue if he blew on it. E thought it would go inside the bottle and N didn't really know what to say!
J blew on the tissue and it shot right back out at him... the kids thought this was hilarious so we all had a go...
Such an easy experiment to do with the kids!
Then of course, kids being kids, they turned back to the potatoes, poured the salt all over them and started making "baked potatoes" for the oven! Yum, yum *cough*
I love how engaged they were in these experiments!
I would love to hear how your little ones go with these experiments :)
How much/ little do you explain the science behind the experiment?
Saturday, 15 June 2013
Volcano!
No science experiment program is complete until there is a Volcano in there!
There are two parts to the experiment- making the volcano and watching the volcano erupt!
The kids started by helping move their little table and chairs out into a sunny spot in the front garden (this was extra exciting for them because they usually play in the backyard - so was a bit special!)
Making the volcano
We needed a small bottle (we used a 600ml water bottle), newspaper shredded into small strips and a paper mache glue mixture.
There are so many different paper mache mixtures out there. I chose a mixture that was safe for little fingers (I knew we had a 1 year old coming over to help, so didn't want her to get sick if she put it in her mouth). All I used was a mixture of flour and water - the kids mixed it together to form a runny paste... This in itself was an experience - watching the flour and water mix together to become thicker was a discussion in itself - and once again I found the kids were using the word "dissolve" (without my prompt) - I had forgotten all about it! (They learned that word in our first experiment "DIY Crystals")
We then covered the strips of newspaper in the mixture and covered the bottle. I had to remind the kids quite often to make sure the newspaper was really wet so it would stick onto the bottle.
There are two parts to the experiment- making the volcano and watching the volcano erupt!
The kids started by helping move their little table and chairs out into a sunny spot in the front garden (this was extra exciting for them because they usually play in the backyard - so was a bit special!)
Making the volcano
We needed a small bottle (we used a 600ml water bottle), newspaper shredded into small strips and a paper mache glue mixture.
There are so many different paper mache mixtures out there. I chose a mixture that was safe for little fingers (I knew we had a 1 year old coming over to help, so didn't want her to get sick if she put it in her mouth). All I used was a mixture of flour and water - the kids mixed it together to form a runny paste... This in itself was an experience - watching the flour and water mix together to become thicker was a discussion in itself - and once again I found the kids were using the word "dissolve" (without my prompt) - I had forgotten all about it! (They learned that word in our first experiment "DIY Crystals")
We then covered the strips of newspaper in the mixture and covered the bottle. I had to remind the kids quite often to make sure the newspaper was really wet so it would stick onto the bottle.
After a couple of minutes my kids needed a well deserved break (!!!) (as 2 and 3 year olds do...), so they took themselves off and worked on their own little experiment. E went into the garage, got a rope, tied it to the front gate and was trying to work out how to pull open the gate with the rope - he tried many times but wasn't strong enough so 2 year old N came along to help...
Thankfully we had friends over to help finish off the paper mache volcano!!
It took a couple of hours in the sun to dry... Then came the fun of painting it!
We mixed different colours together to see which colours mixed together made brown...
then painted it...
Then let the volcano to dry overnight... then came the fun!
We put about 10 teaspoons of bicarbonate of soda into the bottle (my kids are a little obsessed with this stuff now! LOL)... we then poured some vinegar and food colouring into the bottle and...
Kaboom!! Look at their little faces!
It was just so much fun! We did it over and over again and this now became their new favourite science experiment - once again showing it to guests (old and young) with so much excitement - they just loved it.
I had to be really sneaky and actually throw the volcano away because it became a little mouldy on the bottom - the kids keep asking me where it is!! I think we might have to make a new one soon...!
Stay tuned for next week's blog - "Electricity through a Potato...." :)
Subscribe to:
Posts (Atom)