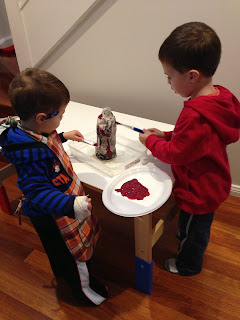
There are two parts to the experiment- making the volcano and watching the volcano erupt!
The kids started by helping move their little table and chairs out into a sunny spot in the front garden (this was extra exciting for them because they usually play in the backyard - so was a bit special!)
Making the volcano
We needed a small bottle (we used a 600ml water bottle), newspaper shredded into small strips and a paper mache glue mixture.
There are so many different paper mache mixtures out there. I chose a mixture that was safe for little fingers (I knew we had a 1 year old coming over to help, so didn't want her to get sick if she put it in her mouth). All I used was a mixture of flour and water - the kids mixed it together to form a runny paste... This in itself was an experience - watching the flour and water mix together to become thicker was a discussion in itself - and once again I found the kids were using the word "dissolve" (without my prompt) - I had forgotten all about it! (They learned that word in our first experiment "DIY Crystals")
We then covered the strips of newspaper in the mixture and covered the bottle. I had to remind the kids quite often to make sure the newspaper was really wet so it would stick onto the bottle.
After a couple of minutes my kids needed a well deserved break (!!!) (as 2 and 3 year olds do...), so they took themselves off and worked on their own little experiment. E went into the garage, got a rope, tied it to the front gate and was trying to work out how to pull open the gate with the rope - he tried many times but wasn't strong enough so 2 year old N came along to help...
Thankfully we had friends over to help finish off the paper mache volcano!!
It took a couple of hours in the sun to dry... Then came the fun of painting it!
We mixed different colours together to see which colours mixed together made brown...
then painted it...
Then let the volcano to dry overnight... then came the fun!
We put about 10 teaspoons of bicarbonate of soda into the bottle (my kids are a little obsessed with this stuff now! LOL)... we then poured some vinegar and food colouring into the bottle and...
Kaboom!! Look at their little faces!
It was just so much fun! We did it over and over again and this now became their new favourite science experiment - once again showing it to guests (old and young) with so much excitement - they just loved it.
I had to be really sneaky and actually throw the volcano away because it became a little mouldy on the bottom - the kids keep asking me where it is!! I think we might have to make a new one soon...!
Stay tuned for next week's blog - "Electricity through a Potato...." :)


Love your blog! If you can get your hands on some pop-rocks (that candy that 'pops' in your mouth, add it to the bi-carb and you'll have a volcano with sound :)
ReplyDeleteOh I love that idea!!! Will definitely pick up some next time I go shopping - the boys will be so excited - they were almost jumping out of their skin the first time - imagine their reaction when they hear the sound! Love! Thanks Cassandra :)
Delete